

Key Takeaways
- Successful composting requires balancing carbon-rich 'brown' materials with nitrogen-rich 'green' materials.
- A compost pile needs air, moisture, and occasional turning to break down efficiently.
- Most kitchen scraps can be composted - but meat, dairy, and oily foods should stay out.
- Finished compost is dark, crumbly, and smells like earth - typically ready in 2 to 6 months.
- Home compost improves soil structure, water retention, and plant nutrition without synthetic inputs.
What you will need
Why Composting Is Worth the Effort
Home composting converts material that would otherwise end up in a landfill into a genuinely useful garden resource. Finished compost improves soil structure in both clay and sandy soils, supports beneficial microbial communities, and releases nutrients slowly as plants need them - without the salt buildup that synthetic fertilizers can cause over time.
If you're starting a vegetable garden from scratch, building a compost habit early means you'll have a free, renewable soil amendment ready each growing season. Compost also helps garden beds retain moisture, which reduces how often you need to water - a meaningful benefit during dry summer months.
Beyond the garden benefits, composting at home keeps organic waste out of your regular trash, reducing methane emissions from landfills. The EPA estimates that food and yard debris together make up a substantial portion of what Americans throw away each year - compostable material that can be put to far better use.
Speed Up Decomposition Naturally
Chop or shred materials before adding them to your pile - smaller pieces expose more surface area to microbes and break down significantly faster. Turning your pile every one to two weeks and keeping it as moist as a wrung-out sponge will also accelerate the process noticeably.
What You'll Need Before You Start
You don't need much equipment to compost effectively. A simple wire mesh enclosure or a purchased plastic bin both work well. The key requirements are adequate volume, good airflow, and a location that's convenient enough that you'll actually use it.
What you will need
Compost bin or wire mesh enclosure
Contains the pile, retains heat, and keeps pests out during the composting process.
Pitchfork or compost aerator
Used to turn and mix the pile, introducing oxygen that fuels microbial activity.
Kitchen compost pail with lid
Collects vegetable peels and scraps on your countertop before transferring them to the outdoor bin.
Garden thermometer
Measures internal pile temperature to confirm active decomposition (ideally 130-160°F).
Watering can or hose
Adds moisture to the pile when it becomes too dry to support decomposition.
If you generate kitchen scraps regularly, you may also want a small countertop pail to collect vegetable peels, coffee grounds, and fruit scraps before taking them outside. Look for one with a tight-fitting lid to minimize odors indoors.
Step-by-Step: Building and Managing Your Compost Pile
Never Compost These Materials
Avoid adding meat, fish, bones, dairy products, oily or greasy foods, pet waste, diseased plants, or treated wood to your compost pile. These materials can attract pests, create foul odors, or introduce pathogens and chemicals that persist in finished compost. Stick to plant-based kitchen scraps and untreated yard waste for safe, effective results.
Choose and set up your composting spot
Select a level area in your yard that gets partial shade - direct sun dries the pile too quickly. Allow at least a 3-foot x 3-foot footprint, which is the minimum size needed to generate and retain the heat that drives decomposition. Place your bin directly on bare soil rather than concrete or pavement; this allows drainage and lets beneficial organisms like worms move in from below.
Understand the 'greens and browns' balance
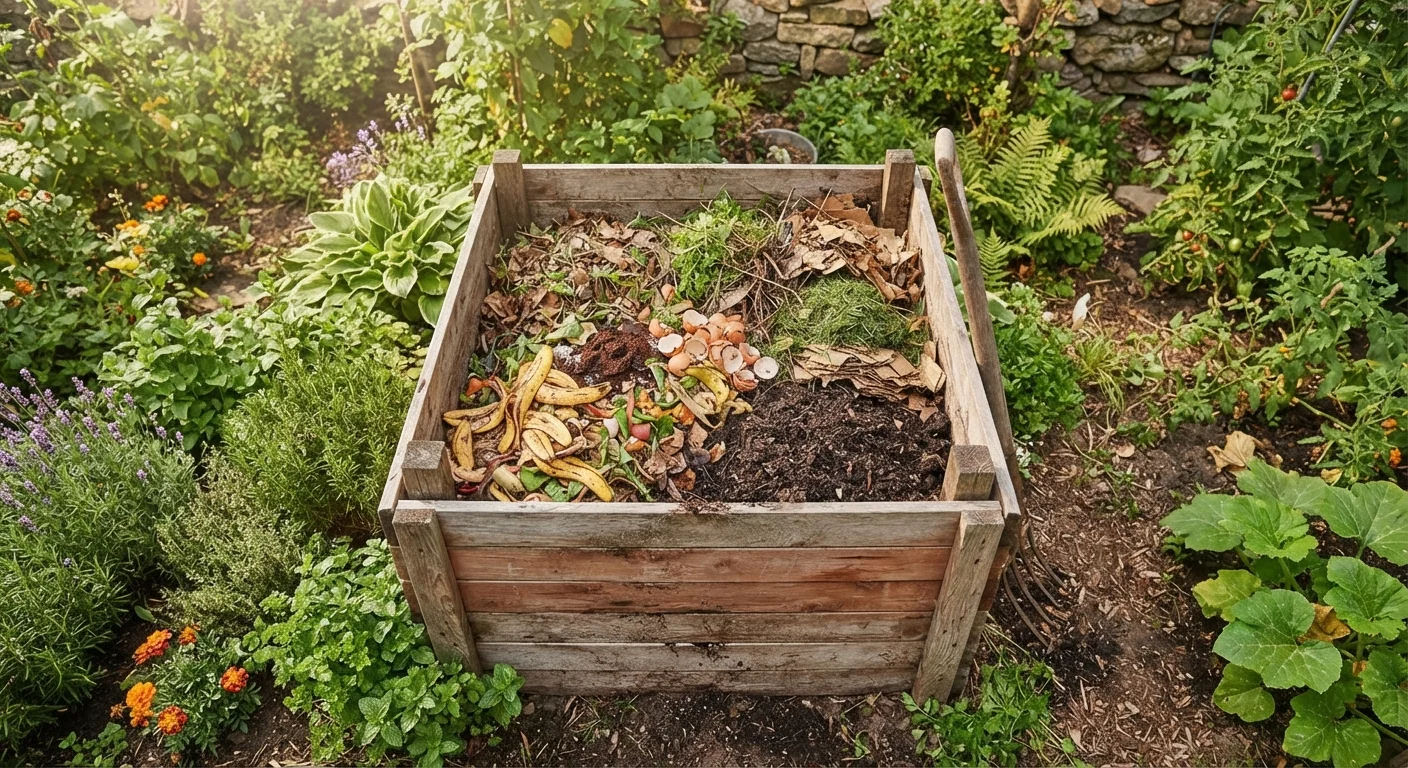
Healthy composting depends on a ratio of roughly 2-3 parts carbon-rich 'brown' materials to 1 part nitrogen-rich 'green' materials by volume.
- Browns (carbon): dry leaves, cardboard torn into pieces, straw, paper bags, wood chips
- Greens (nitrogen): vegetable and fruit scraps, coffee grounds, fresh grass clippings, plant trimmings
Too many greens without enough browns produces a slimy, smelly pile. Too many browns slows everything down. Keeping this balance is the single most important composting skill.
Layer your materials and add the first batch
Start your pile with a 4-inch base layer of coarse browns - wood chips or straw work well - to allow air circulation from the bottom. Add a layer of greens on top, then cover with another layer of browns. Lightly water each layer so the pile feels evenly moist throughout, similar to a damp sponge. Avoid packing layers down; loose structure keeps oxygen moving through.
Turn the pile regularly to speed decomposition
Every one to two weeks, use your pitchfork to turn the entire pile - moving material from the outside edges toward the center and lifting from the bottom. This reintroduces oxygen, which prevents the pile from going anaerobic (the main cause of bad odors), and redistributes heat and moisture evenly. More frequent turning means faster finished compost.
Monitor moisture and temperature
Check your pile's moisture level every week by squeezing a handful. It should feel like a wrung-out sponge - damp but not dripping. An active, properly balanced pile will feel warm or even hot in the center (130-160°F is ideal). If your pile never heats up, it likely needs more greens or moisture. If it smells like ammonia, add more browns and turn it.
Recognize finished compost and harvest it
Compost is ready to use when it looks dark brown and crumbly, smells earthy (like forest soil), and you can no longer identify the original ingredients. This typically takes 2 to 6 months depending on conditions and how often you turn the pile. To harvest, stop adding new material and allow the pile to cure for two to four weeks, then screen or sift it if you want a fine texture. Use it as a soil amendment, mulch, or potting mix additive in your garden beds.
Troubleshooting Common Composting Problems
Even well-managed piles run into occasional issues. Here's how to read what your pile is telling you:
- Pile isn't breaking down: It needs more nitrogen (greens), more moisture, or both. Add fresh grass clippings or vegetable scraps and water lightly.
- Pile smells like rotten eggs: This indicates anaerobic conditions - too wet and not enough air. Turn it thoroughly and add dry browns to absorb excess moisture.
- Attracting pests: Ensure you're not adding prohibited materials (meat, dairy, cooked foods). Bury fresh food scraps in the center of the pile rather than leaving them on top, and consider a bin with a secure lid or base.
- Pile is steaming: This is normal and a good sign - your pile is actively decomposing at high temperature.
Pile Too Wet or Too Dry? Here's Why It Matters
A pile that's too dry will stall decomposition entirely; one that's too wet becomes anaerobic and will start to smell unpleasant. Check moisture regularly by squeezing a handful - you should get a drop or two of water, but no more. Adjust by adding dry browns if it's soggy, or watering lightly if it's dusty.
Many gardeners find that once they troubleshoot one problem, their pile stabilizes and requires minimal intervention. For more ways to build better growing conditions, see our guide on common garden myths that may be holding your yard back.
Using Your Finished Compost in the Garden
Once your compost has cured to a dark, crumbly, earthy-smelling material, it's ready to work with. The most common uses include:
- Soil amendment: Dig 2-4 inches of compost into the top 6-8 inches of a new or established garden bed before planting.
- Top dressing: Spread 1-2 inches over the surface of existing beds and allow it to work into the soil naturally over time.
- Potting mix: Blend finished compost with other materials as a component of container growing media - it works well for container gardening setups.
- Lawn application: Apply a thin layer over grass during overseeding to improve soil contact and moisture retention.
The more consistently you compost kitchen and yard waste, the more of this amendment you'll have available season after season - and the less you'll need to purchase or import from outside your yard.