

Key Takeaways
- Your water meter can detect hidden leaks before they cause structural damage or spike your bill.
- Most residential meters use either a sweep-hand dial or a digital display - both are easy to read.
- A simple two-reading test performed an hour apart can confirm whether a leak is present.
- The low-flow indicator on many meters flags even very small, continuous leaks.
- Confirming no water is running inside or outside is essential before starting any leak test.
What you will need
Why Your Water Meter Is a Diagnostic Tool
Most homeowners think of the water meter as something the utility company reads once a month. In reality, it's one of the most useful diagnostic instruments in your home - available to you at any time, at no cost, and requiring no special skills to interpret.
Hidden leaks are more common than many people realize. A slow drip from a toilet flapper, a pinhole in a supply line behind drywall, or an irrigation valve that doesn't fully close can collectively waste thousands of gallons before showing up as visible damage. By the time water stains appear on a ceiling or floor, the problem may already be significant. Understanding how to use your meter lets you spot these issues early - often before any other symptom appears.
Unexplained water use can also quietly inflate your utility bill month after month. If you're already thinking about where household money goes, pairing meter checks with a broader household spending audit can surface costs that are easy to miss. Similarly, if outdoor irrigation is part of your routine, knowing your baseline consumption helps you recognize when watering habits may be wasting water.
What you will need
What You'll Need and How to Find Your Meter
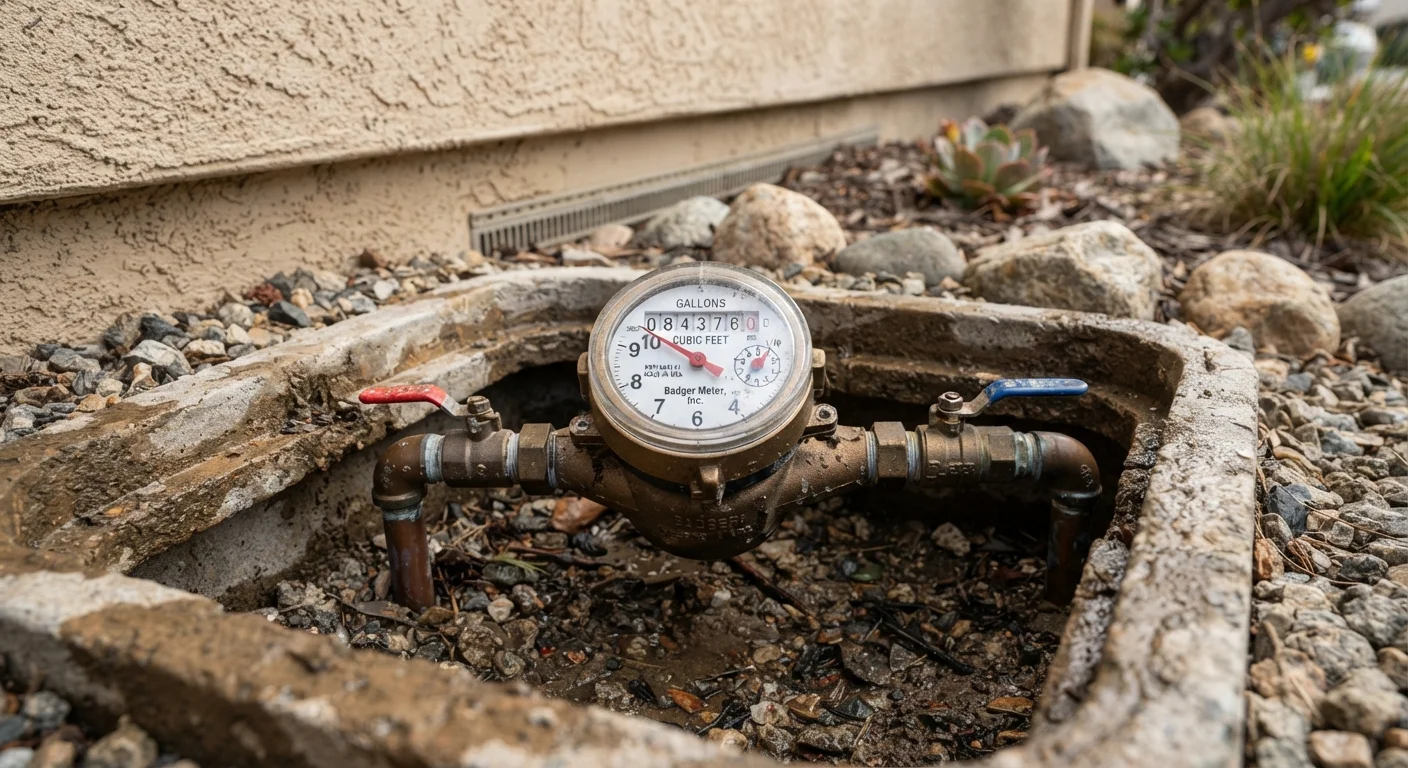
Before you start, gather a few simple items. Water meters are generally located in one of two places: in a covered box set into the ground near the street or sidewalk (called a meter pit or curb box), or attached to an exterior wall or inside a basement utility area in colder climates where freezing is a concern.
Look for a rectangular or round cover flush with the ground, often marked "WATER" or stamped with your utility's name. Use your tool to lift the lid - covers can be heavy and may have debris around the edges. Inside, you'll find the meter and, in some cases, the main shutoff valve.
Flat-head screwdriver or meter key
Used to pry open the meter pit lid, which is often flush with the ground and can be difficult to lift by hand.
Flashlight or headlamp
Illuminates the meter pit interior, which can be dark, dirty, or partially obscured by debris.
Notepad and pen (or phone camera)
Records the meter reading before and after the test period so you can compare figures accurately.
Watch or phone timer
Tracks the one-hour waiting window between your two meter readings.
Once you've located the meter, take a moment to identify the meter type before reading it. The two most common residential designs are the analog sweep meter (which looks like a clock face with one or more dials) and the digital or LCD display meter. Some meters combine both. Either type will serve the same purpose for a leak test.
How to Read the Meter and Run a Leak Test
Follow the steps below to take an accurate reading and determine whether your home has an active leak. The full process takes as little as one hour of waiting time, with just a few minutes of active effort.
Turn off all water sources in and around the home
Before taking any reading, confirm that every faucet, appliance, toilet, hose bib, and irrigation zone is fully off. This includes ice makers, whole-house humidifiers, and any outdoor spigots. Even a single dripping faucet will compromise your results. Walk through the home to verify.
Check the low-flow indicator before recording anything
Many meters have a small triangular, star-shaped, or gear-shaped indicator called a low-flow indicator or leak detector. It's typically red, black, or blue and is separate from the main sweep hand or digital display. With all water off, watch this indicator for 30-60 seconds. If it moves at all - even slowly - water is flowing somewhere in your system right now.
If the indicator is spinning, you already have confirmation of an active leak. You can skip the timed test and go directly to identifying the source.
Record your first meter reading
On an analog meter, read the numbers displayed on the odometer-style register (the row of digits), which typically measures in cubic feet or gallons. Ignore the sweep hand for now - the register gives you a cumulative total. Write down the full number, including any zeros.
On a digital meter, simply read the number shown on the LCD display. Some digital meters cycle through multiple screens - wait for the consumption reading (often labeled in gallons or CCF, meaning hundred cubic feet).
Photograph the display with your phone as a backup record.
Wait one hour without using any water
Set a timer for 60 minutes. During this period, no water should be used anywhere in the home or on the property. Remind all household members. If someone accidentally flushes a toilet or runs a tap, you'll need to restart the test.
Record your second reading and compare
Return to the meter and record the reading exactly as you did before. Compare the two numbers.
- No change: No detectable leak through the meter during the test period. Your system appears tight.
- Any increase: Water moved through the meter while everything was off - a leak is present somewhere between the meter and your fixtures.
Even a small difference matters. An increase of 0.1 CCF (about 75 gallons) in one hour represents a significant continuous loss and warrants investigation.
Leak Confirmed? Don't Wait to Act
A confirmed meter leak that you cannot attribute to a known fixture - like a running toilet - likely means water is escaping somewhere hidden: a buried supply line, a slab leak, or a connection inside a wall. These situations can worsen rapidly and may not be covered by standard homeowner's insurance if neglect is evident. Contact a licensed plumber promptly rather than monitoring the situation over several billing cycles.
If your test confirms a leak but you can't locate the source yourself, plumbing issues that are hard to see are often behind walls or underground. A licensed plumber can use pressure testing or leak detection equipment to pinpoint the source without unnecessary demolition. Don't delay - water damage compounds quickly, and some moisture intrusion can affect flooring and subfloor integrity in ways that aren't immediately obvious. For more on how water affects interior surfaces, see what "waterproof" flooring claims actually mean.