

Key Takeaways
- Most vehicles have six key fluids to monitor: engine oil, coolant, brake fluid, power steering fluid, transmission fluid, and washer fluid.
- Checking fluid levels takes 10-20 minutes and requires no special tools beyond a clean rag.
- Always check fluids on a level surface with the engine off and cooled down to get accurate readings.
- Low or discolored fluid can signal a leak or internal problem that warrants a mechanic's inspection.
- Fluid checks are a core part of seasonal vehicle prep and overall preventive maintenance.
What you will need
Why Fluid Checks Matter
Your car relies on a network of fluids to lubricate moving parts, transfer heat, transmit force, and keep systems clean. When any one of these drops below the recommended level - or degrades in quality - it places stress on components that are expensive to repair or replace.
The good news: checking fluid levels is one of the simplest maintenance habits a driver can build. It requires no mechanical expertise, costs nothing, and takes less than 20 minutes. It also pairs naturally with other quick checks, like inspecting tire pressure and tread depth, making it easy to bundle into a single routine walkthrough.
This guide walks you through each fluid, where to find it, and what a healthy reading looks like.
What you will need
Step-by-Step: Checking Each Fluid
Work through these fluids in order. Always start with a cool engine on flat ground. Refer to your owner's manual for reservoir locations specific to your vehicle - layouts vary by make and model.
Check the Engine Oil
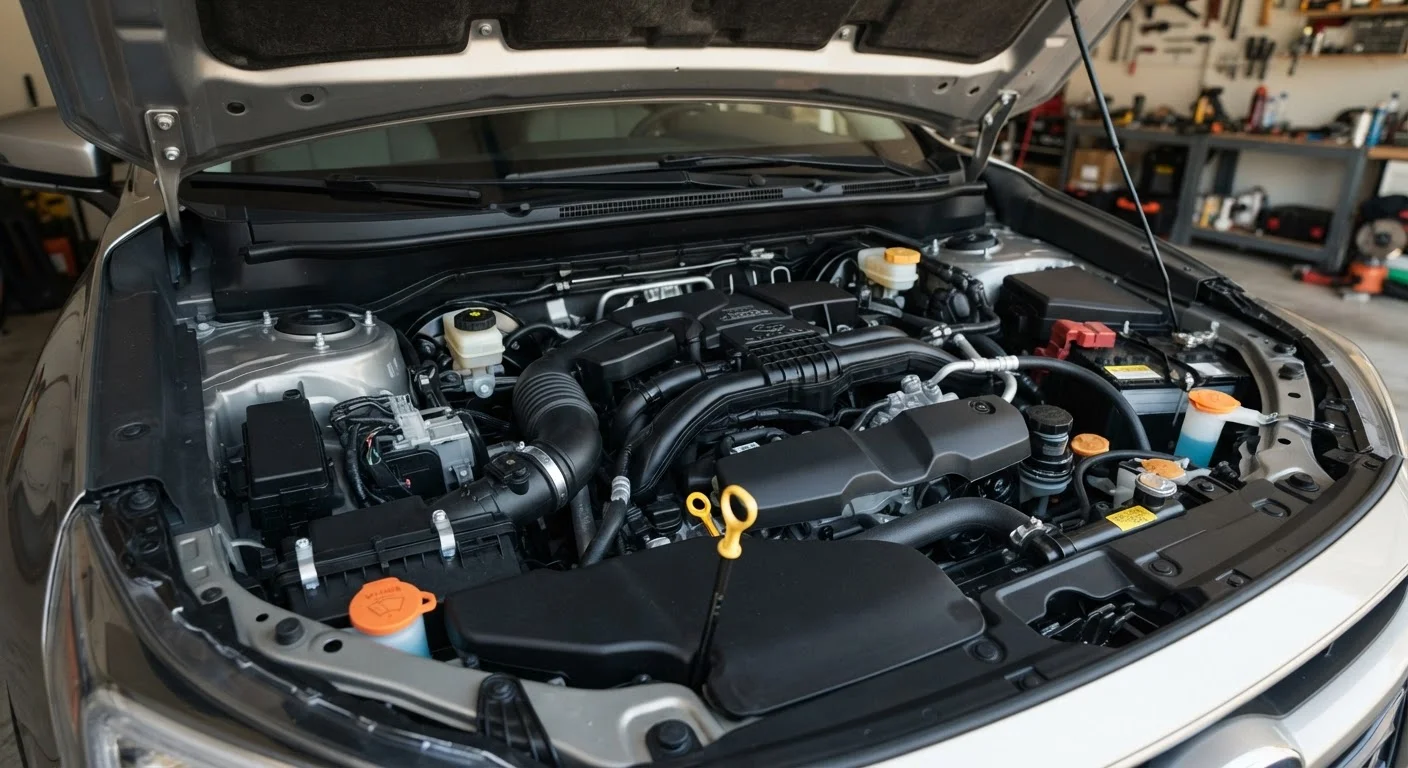
Locate the oil dipstick - usually a brightly colored handle near the engine center. Pull it out, wipe it clean with a rag, reinsert it fully, then withdraw it again. The oil level should fall between the two marks (MIN and MAX, or Low and Full). The oil itself should appear amber to dark brown; it should not look milky or contain visible particles.
Check the Coolant (Antifreeze)
Find the translucent coolant reservoir - typically near the radiator. Without removing the radiator cap, check that the fluid sits between the MIN and MAX lines visible through the reservoir wall. Coolant should appear bright and clear in color (green, orange, or pink depending on the formulation).
Check the Brake Fluid
The brake fluid reservoir is a small, semi-transparent plastic container usually mounted on the brake master cylinder near the firewall on the driver's side. The level should be between MIN and MAX. Fluid should appear pale yellow to light amber. You can check the level visually through the reservoir without opening it.
Check the Power Steering Fluid
If your vehicle has hydraulic power steering (electric systems don't use fluid), find the reservoir - often labeled with a steering wheel icon. Some have a dipstick attached to the cap; others use MIN/MAX markers on the reservoir. The fluid should sit within range and appear pink or red, not dark or burnt-smelling.
Check the Transmission Fluid
Automatic transmission fluid (ATF) is checked via a dipstick in most older vehicles - look for a second dipstick toward the rear of the engine bay. With the engine warm and running (for most vehicles), pull the dipstick, wipe, reinsert, and check: fluid should be between MIN and MAX and appear bright red. Many newer vehicles have sealed transmissions with no accessible dipstick - consult your manual or a technician for those.
Check the Windshield Washer Fluid
The washer fluid reservoir is a large plastic tank - often in a corner of the engine bay - marked with a windshield icon. Simply remove the cap and top it off with automotive washer fluid if low. In winter, use a formula rated for freezing temperatures in your region.
Build a Simple Monthly Habit
Set a recurring reminder to check fluids once a month or every other fill-up. Pairing this task with a gas station stop makes it easy to remember. Consistent monitoring catches small problems - like a slow coolant seep - long before they cause roadside trouble or costly repairs.
When Low or Dirty Fluid Means Something More
Topping off a fluid is not always a fix - it can be a signal. If a fluid level is consistently low between checks, a leak or internal consumption issue may be present. Engine oil that looks milky or frothy, for example, can indicate coolant mixing into the oil - a serious mechanical condition. Brake fluid that drops noticeably over weeks warrants inspection of brake lines, calipers, and the master cylinder.
Color matters too. Coolant should appear bright green, orange, or pink depending on type - never brown or rust-colored. Brake fluid should be nearly clear to light amber; dark brown means it has absorbed too much moisture and should be flushed by a technician. For a closer look at how braking system components wear and when professional attention is non-negotiable, see how your braking system wears over time.
Fluid checks also slot naturally into seasonal preparation. Temperature extremes affect fluid viscosity and condition in ways that aren't always obvious. For a full seasonal checklist, seasonal vehicle prep for winter and summer covers what to prioritize before each climate shift.
If you're ever unsure whether a fluid concern is a quick top-off or something requiring a shop visit, the broader context of what DIY car maintenance is reasonable to tackle yourself can help you draw that line confidently.